So, Jeff and I finally got the tree up yesterday. He went and picked it up on his way home from work, and it really made me realize once again how our lives have changed. He told me a story about how he was walking along at Trees of Joy, hearing a family "discussing" the perfect tree for their family, and it reminded him of our kids "discussions" through the years! He made a comment about how much fun we used to have going to Bethany Christmas Tree Farm in McDonough for so many, many years, and how much we looked forward to that as the start of our Christmas each year.
Christmas seems VERY different this year, in many ways; the most obvious, of course, is that my Mother is no longer with us. Although it is so reassuring to know where she is and that she is well, and standing up, if not TALL, at least STRAIGHT, I still miss her and often can hardly believe it even after almost a year. A note on her shortness, she was, after all, a Griffin/Eppinger woman, and they are NOT tall women! My grandmother (Mama) was not even 5 foot tall!
We have many many things to be thankful for! Jobs and a roof over our heads; all of our children will be with us for at least a few days, we have another beautiful granddaughter to look forward to meeting in February, and yet, I feel......sad? meloncholy? (How do you spell that word?) I can't seem to shake it. As I read my grief share devotions, and workbook, I understand and realize that what I am feeling is normal - that doesn't mean I like it!
I am trying to feel positive and excited, and I know that I will be fine once they all start arriving on Thursday - THURSDAY! - but I wonder already how I will be when they all go back to other places (I refuse to say "home). I'll be fine - I know that the Lord will hold me up through this season of my life, just keep praying for me!

Friday, December 16, 2011
Monday, November 7, 2011
Fabric as a Wall Covering
***I can't believe I'm just now getting around to writing this post... This was a DIY project I did several months ago, but things have been so hectic since then I haven't had time to write about it! When I realized that, I wanted to get on here right away and share this with you because I was so excited about it when I did it, and I think it turned out great!
The bathroom in my apartment has been in dire need of a makeover, but there is only so much you can do when you are renting. After the whole "tree-incident" (if you don't know about the tree growing into my bathroom through the wall, well that's a whole story in itself for another time!), the landlord did some "repairs" and put in a new floor, but I was still desperate to overhaul it and decorate. The wall where the tree had once grown has never been the same since, even with repairs, and I wanted to cover that thing up with wallpaper or something. Alas, wallpapering is a forbidden sin for renters...
Here is the boring old bathroom wall:

In comes an absolutely brilliant idea - DIY fabric wallpaper! Originally I got the idea from this blog post on Design Sponge about a faux headboard made of fabric that had been attached to the wall with liquid starch - absolutely adorable (and by
the way, the headboard project itself is still a coming attraction in my apartment!). The selling point - attaching fabric to the wall with liquid starch makes a wall covering that is totally removable later! I did some research (i.e. googling - or as we call it in the Watts family - doing a "whoogle search," haha) and found all sorts of articles and blog posts about this technique. The more I read, the less skeptical I was about it, and I started to believe it would (1) really work, and (2) actually be removable. Some people even claim you can take that fabric off the wall later, throw it in the washing machine, and then use it again for a whole different project! Genius!
Next came the search for fabric, which was already documented on the blog here. I chose a white, red and pink striped fabric that coordinated with the "birds in a cage" fabric I had previously chosen to make a sink skirt out of (don't ask, that project has been going nowhere fast!). Then came the search for liquid starch. Would you believe you cannot actually find liquid starch in the store? Any store! I looked at Target, grocery stores, Walgreens. OK, maybe I didn't do an exhaustive search, but it was enough for me to decide to just go online. Back to google and I found it online at Walmart. Having no idea how much liquid starch I needed, I over-ordered, as usual, and ended up with something like 4 large containers (hey, they were only like $1.97 each!). My final shopping trip for supplies was to the hardware store, where I purchased spray starch (the regular laundry kind), drop cloths, painters cloths / towels, paint rollers, plastic putty knives, blue painters tape (which we didn't actually use), and paint pans. What I should have bought also in this trip was gloves, but I'll get to that later.
Having all of my supplies assembled, I planned a weekend day for the project and enlisted Mandy's help. We decided to use the outdoor patio area to assemble things and to measure the fabric so we'd have plenty of room.
Here's a step by step of what we did.
1. Measure the wall - Multiple times!!!
The first time I measured the wall was before I went fabric shopping, so that I'd be able to estimate how much fabric to buy. I measured all the way across, then from top to bottom. When I picked out a fabric, I figured out how wide it came, and decided how many yards based on how many lengths of wall I would need (basically the width of this particular fabric was about half of my wall space, so I doubled the height of the wall and then rounded up).
After purchasing the fabric, we measured the wall again, multiple times. We then did various calculations to determine the best use of the fabric, deciding to basically divide the wall into three "sections" across - the middle section would be above and below the window, and then there would be one section on either side with a panel going from floor to ceiling. We then measured each of those sections separately to determine how to cut our fabric.

2. Measure and cut the fabric into panels
After all of these overly complicated calculations, we laid the fabric out on the ground, measured for each section, and cut the fabric into two long strips of the necessary width for the two side panels, and two squares for above and below the window.
 3. Prep for application
We then brought the fabric back inside into the bathroom, where I had removed almost everything, put down drop cloths, and set out the paint pans and rollers. We poured the liquid starch into the pans. Each strip of fabric was then sprayed with spray starch to stiffen it up before we applied it.
4. Roll liquid starch onto wall
Next we rolled liquid starch onto the wall on the section we were working on first. We started at the top of the wall and coated the starch on about 1/3 of the way down to start. Liquid starch is really messy - and sticky! This is when I wished I had gloves! It kind of went everywhere, but thankfully it was easy enough to clean up later.
5. Attach fabric to the wall, and apply more starch as needed to attach
Then (and this part definitely took both of us), we placed the fabric onto the wall at the top, smoothing as we worked our way down onto the area that had been starched. This part was especially difficult due to my fabric choice - those stripes had to be straight! After that section was "attached" we starched the wall the rest of the way down and continued smoothing the fabric onto the wall. Once one entire panel was on the wall, we used painter's cloths drenched with more liquid starch to apply additional starch on top of the fabric. We didn't do this over the whole panel, just in the corners, sides and areas that seemed to need it. We also used the plastic putty knifes to help smooth the fabric down and into the corners. Then we repeated this whole process for each section of the wall.

6. Let the fabric dry (break time!)
It took a while for the fabric to dry out. During this time, we cleaned up our mess, walked the dogs, had some food and took a break!
7. Cut "edges" off around the fabric wall
Once the fabric was fairly dry, we made sure there were no areas that were not attached (and where they were, we just dabbed on some more starch using the cloths). Then we cut the edges off of the fabric where there was "extra" using a box cutter. If I was doing this again, I probably would not have calculated for "extra" around the edges - I had read that the fabric would shrink as it dried and therefore this was necessary, but my fabric did not shrink at all and cutting off the edges was a pain.
8. Voila! Fabulous Wall!


Sunday, July 31, 2011
My Mother's Cookies or the Quest for Tea Cakes
Recently Carrie, Alison, Vicki and I have been trying to find my mother's tea cake recipe, and I understand that there was a bit of a "discussion" with their Uncle Ken about whether or not she made cookies. Let me set the record straight - she did. (sorry, Ken - maybe she had stopped by your "only child" days, but she made them plenty of times!) These are the homemade cookies that I remember.
SUGAR COOKIES: When I was a little girl, Mother & I always made cookies at Christmas time, and one of my favorites were plain old sugar cookies. Of course, my reason for loving those the best was because she would let me decorate them. I remember cookie cutters of Christmas trees, stars, and a gingerbread man shape. I am sure there were more, but those I remember. We would also cut out circles with the ring from a mason jar lid. Mother would mix up an icing using a little melted butter with powdered sugar, and if it got too thick, she added a few drops of water. Then she would divide it up in little bowls, and add a couple of drops of food coloring to each one. She would give me a butter knife and "sprinkles" to decorate the top. I loved to add the sprinkles and to make faces and buttons on the gingerbread men. (I don't remember ever making real "ginger" bread men, just the sugar cookies shaped like gingerbread men) When we still lived in Concord, Mother and Daddy would have "socials" after church on Sunday nights sometimes where the teenagers from Mt. Olive would come over and play games. I remember making sugar cookies for those, Christmas time and other times too. BTW - these cookies were often burned around the edges too; part of the "art" of applying the icing was hiding the burned edges!
ICEBOX COOKIES: These were the famous Grandma Sanvidge icebox cookies. Ken doesn't want to remember them because he didn't like them! No one in our house liked them except for Daddy and me. VERY rarely Mother would make up a batch. You shaped the dough into a long roll, wrapped it in foil and put it in the frig overnight before cutting it into slices and baking them. Still my very favorite cookie!
FRUIT CAKE COOKIES: My Mother's favorite cookie and my least favorite! I think the recipe is probably the same as the sugar cookie, but I'm not sure. Then she would add chopped pecans and pieces of candied fruit (the kind you put in fruit cakes) to the batter and spoon it onto cookie sheets before baking it. Something about those little pieces of candied fruit that I didn't like - I never liked fruit cake either (and yes, she made those too).
I believe that my mother's own quest for tea cakes came later in life, after she had grandchildren. I don't ever remember making them or even hearing her talk about them when we were growing up, but after I reached adulthood, she started talking about them. I think one of her older sisters (probably Sister, Sara or Janie) made them, and she wanted to make them too, but didn't want to admit to them that she didn't know how! She began making them, and like you girls remember, always had them in the jar for y'all, always burned around the edges. Mrs. Prosser made a wonderful tea cake and would bring her some a lot of times later in her life - I think that was after y'all were all grown, or at least past the age when she would share her cookies with you.
While I'm on the subject of her baking, my Mother used to bake a lot more than she did in later years. She used to make fruit cobblers a lot - those were a cheap dessert I guess when we were growing up. She would make fruit cakes and give them away a Christmas. Occasionally, she made pound cakes (a favorite of hers) but never thought hers were as good as her sisters, so didn't make them often.
We all joke about my Mother's lack of cooking skills, and I'll be the first to say, she was not the best cook in her bunch of sisters by a long shot. She didn't experiment; she kept things basic, although she was never one to worry about "substituting" often with disasterious results! However, although I never really had a cooking "lesson" from my Mother, I guess I learned some things from her, though not how to make TEA CAKES!
Sunday, July 17, 2011
Hungarian Cabbage Rolls
When your dad and I first married, one of his favorite dishes that Nanny made was Cabbage Rolls, or stuffed cabbage. When she was living she taught me how to make them, but of course, I can’t find the recipe now. The other day Jeff came home with a recipe that he had gotten from a family recipe book that he was leafing through in a co-worker’s office. We have no idea who “Wanda Kittle” is, but this is her recipe, as I received it – as mixed up as it is written.
Hungarian Cabbage Rolls
2 Large heads of cabbage
2 lbs. ground beef
1 ½ cups rice (uncooked)
2 small onions chopped
2 large eggs
1 tsp salt
1/3 tsp pepper
Put cabbage in boiling water. Set 40 minutes so you can pull leaves apart. Chop rest of cabbage and lay in bottom of large dutch oven. Combine next 5 ingredients mix well set aside.
Take cabbage leaves and put 1 tbsp. mixture in each one and roll up. Lay on top of chop leaves.
Slice onions very thin. Take bell peppers slice very thin – chop garlic up – about 5 cloves very thin – 2 cans diced tomatoes 3 tbsp. brown sugar mix all of this together pour over top and bake on 350 until done about 2 ½ hours.
Now, I didn’t tell your dad this, but this recipe has me pretty confused to put it mildly. What peppers and garlic? They are not mentioned in the ingredients at all! Brown sugar? Tomatoes? Where did that come from?
The similarities to Nanny’s seem to me to be: cabbage, ground beef and rice – that’s all. But I am going to try it. Immediately, these are the changes I am making:
1 head cabbage
2 lbs ground chuck
1 ½ cup rice uncooked
1 large Vidalia onion chopped
1 bell pepper chopped
5 cloves garlic chopped
2 large eggs
2 cans diced tomatoes
3 tbsp. brown sugar blend
Boil cabbage in large pan (I’m using my soup pot with the colander insert), completely covering the cabbage with water. I’ve just started it cooking, and I have left it whole, and set the timer for 40 minutes as instructed. However, I am thinking that I could have separated the leaves before cooking, and they might have cooked quicker.
I am going to sauté half of the onion, bell pepper and garlic until just tender, then mix this with the ground chuck, rice, salt and pepper. I am going to roll enough meat mixture into the cabbage leaf to make a roll about the size of an egg roll. Then I am going to place a layer of chopped cabbage leaves in the bottom of a large casserole dish and place each roll on top. I am going to mix together the brown sugar, the rest of the onion/pepper/garlic, and the tomatoes and pour over the top. I will cover the dish with foil, and bake at 350. For how long? That remains to be seen. I find it hard to believe that it will take 2 ½ hours! More later………….
That was my plan. However, while the cabbage was cooking, I started looking online at recipes, and changed things yet again. It was DELICIOUS!!!!!!! But, as we were eating, we realized a couple of more changes that needed to be made to perfect the recipe. So, the final REAL recipe is below.
2 heads of cabbage
2 lbs ground beef
1 ½ cup long grain uncooked rice
1 large Vidalia onion sliced thin
1 large bell pepper sliced thin
2 large eggs
2 cans diced tomatoes
¼ cup brown sugar blend
2 cans sauerkraut
salt
pepper
Cut the bottom off the cabbages, and place in a large soup or stew pot. Cover completely with hot water. Boil until cabbage is tender enough to be flexible. Remove cabbages from water, but save 3 cups of the water the cabbage cooked in.
While the cabbage is cooking, mix together ground beef, rice, ½ of the bell pepper, 2 large eggs, salt and pepper.
After the cabbage is taken out of the water, let it cool enough to handle, then carefully separate the leaves, and spread them out on a cookie sheet. Have a box of toothpicks handy! Take a small handful of meat mixture, and shape it into a “log”. You will get the feel for how much meat to put in each one quickly. Beginning at the bottom end of the cabbage leaf, wrap the leaf around the meat, and secure with a toothpick. You will have enough meat for about 20 – 25 small cabbage rolls. Take the inner most part of the cabbage (too small to use to wrap) and chop it up. Place it in a small and mix with a can of sauerkraut. Put a layer of cabbage/sauerkraut on the bottom of the soup pot. Top with a layer of cabbage rolls. Place a layer of bell pepper & onion slices, and another layer of rolls, placing all the rest of the cabbage rolls in the pot (on top of each other is ok). Top with the rest of the cabbage/kraut mixture. Top with 2 cans of tomatoes and sprinkle the brown sugar on the top.
Put the top on the pot. Turn the burner on medium high and set the timer for 1 hour. After an hour, check to make sure there is still plenty of liquid in the pot, and set the timer for 1 ½ hour. (add water if needed) At the end of the 2 ½ hours, eat up! I served it with mashed sweet potatoes.
They were fantastic! Of course, I have enough for Pharoah's Army, as Grandmother would say! Looks like I know what I'm having for lunch this week!
Monday, June 27, 2011
Fabric Shopping in LA's Fashion District

This past weekend I dragged Mandy downtown in search of some great fabric finds in LA's fashion district. Being a "planner," I read reviews of places on Yelp, and read about people's experiences on other blogs so I'd know what to expect, but it was still a bit overwhelming.
Here's a link to the official webpage for the Fashion District: www.fashiondistrict.org. As you can see, there are simply TONS of stores selling fabric! I have a few projects in mind that I needed large pieces of fabric for and thought I'd be able to find better deals by going to these places than ordering it online, and hopefully better selection than at Joann's.

I parked towards the south / east end of 9th street, on San Julian in a kind of sketchy looking lot with unclear information about when it closed.
 Mandy and I then started walking up 9th street, where we were immediately inundated with dozens of small store fronts overrunning with fabric. Right away we started noticing a problem - even the ones that had cute-looking patterns did not have anything "useable" for anything we were doing / making, as the fabrics were all polyester or something stretchy and weird feeling - Here are some examples:

In Michael Levine, we found LOTS of great fabrics! The selection of good quality choices was really amazing! So even though the prices weren't dirt-cheap by any means, it was still slightly less expensive than what I usually pay online - and I could see and touch the fabrics before choosing! Here's what we found:


clockwise: Me picking out striped fabric (see below); Mandy with her stack, waiting in line at the cutting table; my stack of choices waiting to be cut
After Michael Levine, we were pretty much done. The combination of the heat (why is there NO breeze downtown?!), and the overwhelming effect of all of the fabric options was exhausting! So even we only made it like 2 blocks, we were ready to go. I would say the adventure was a success, and lots of fun, even though ultimately I only found 1/3 of what I actually went in search of!
 Of all of the fabrics I found that I just had-to-have, this was the only one that allowed me to check something off my list - I'm going to use this striped fabric to make a fabric covered wall in my bathroom! The little piece is a sample of fabric I'm using to make a skirt for the sink, which I brought along to coordinate.
Tuesday, June 14, 2011
From the Woods to Your Table
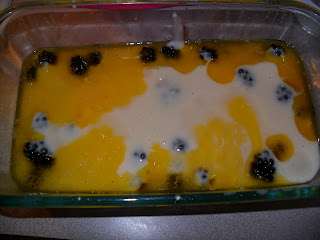
One fabulous thing about our house in NC: The Woods Behind Us Is FULL of BLACKBERRIES!!!
I picked a few tonight and made a cobbler for two! It was delicious!

It ended up being about 1 1/2 cups :)

Melt 2-4 table spoons of butter in the bottom of an oven safe pan.

Add berries and sprinkle with sugar.

Combine in small bowl: 2/3-3/4 cup of four, 1/2 cup sugar, 1 tsp. baking powder, and 1/2 milk. Mix until smooth.


Pour batter over the top of the berries.
Sprinkle with a little brown sugar or cinnamon (optional).
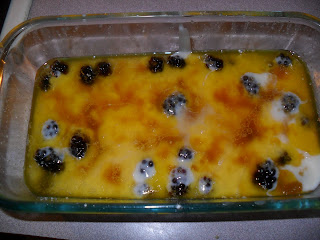
Bake at 350 for 45 minutes or until browned to your liking!

Pour yourself a glass of milk and eat while it's still hot ;)


I picked a few tonight and made a cobbler for two! It was delicious!

It ended up being about 1 1/2 cups :)

Melt 2-4 table spoons of butter in the bottom of an oven safe pan.

Add berries and sprinkle with sugar.

Combine in small bowl: 2/3-3/4 cup of four, 1/2 cup sugar, 1 tsp. baking powder, and 1/2 milk. Mix until smooth.


Pour batter over the top of the berries.

Sprinkle with a little brown sugar or cinnamon (optional).

Bake at 350 for 45 minutes or until browned to your liking!

Pour yourself a glass of milk and eat while it's still hot ;)


Friday, June 10, 2011
Easy, Breezy, Nice and Cheesy
When my friend Erin Powell first moved to Athens to start Pharmacy School (yes, she's a smarty-pants), she invited me over to hang out with her and her awesome son Maddox! She cooked me a yummy dinner (yeah, crazy I know, she's brilliant and a good cook) that has since become a stable in the my cooking menu. It's so simple and SO GOOOOD! Erin has been my friend for a long time and I'm so glad I have her!
 Me, Sally, and Erin at a UGA Game
 Me and Erin on my wedding day!
I hope you enjoy her yummy recipe just as much as I do!
Fast, Easy, Creamy, Chicken Enchiladas:
4 oz Cream Cheese
2 Chicken Breast
1/4-1/3 of White Onion
4 Flour Tortillas
1 8oz can of Enchilada Sauce
Heavy Whipping Cream (probably about a third of carton?)
Shredded Mexican Cheese (a hand full)
Salt, Pepper, Garlic Powder, Cayenne Pepper (Optional)
Cut Chicken Breast into small pieces.

Cook with butter and seasoning of your choice. (I usually sprinkle a little of everything listed above.)

Sliver 1/3 to 1/4 of a white onion, cook with a little butter or oil.

Combine onions, chicken, and cream cheese in bowl.


Spoon out mixture on to your four tortillas.

Roll up the tortillas and place them side by side in an oven safe dish.

Alternate, drizzling with enchilada sauce, then heavy whipping cream, until all the sauce is used up.

Top with shredded cheese and bake for 30 minutes (or until all cheese is melted) at 350.


I like to serve them with these:

Why? Because they are also simple and delicious. If you would like instructions, they are as follows: Open can, dump contents in pan, place pan over medium heat, when contents are warmed, they are ready, now eat them :)

Yep, I like a lot of sour cream, you can blame my mama for that one ;)
Until next time, happy cooking and even happier eating!
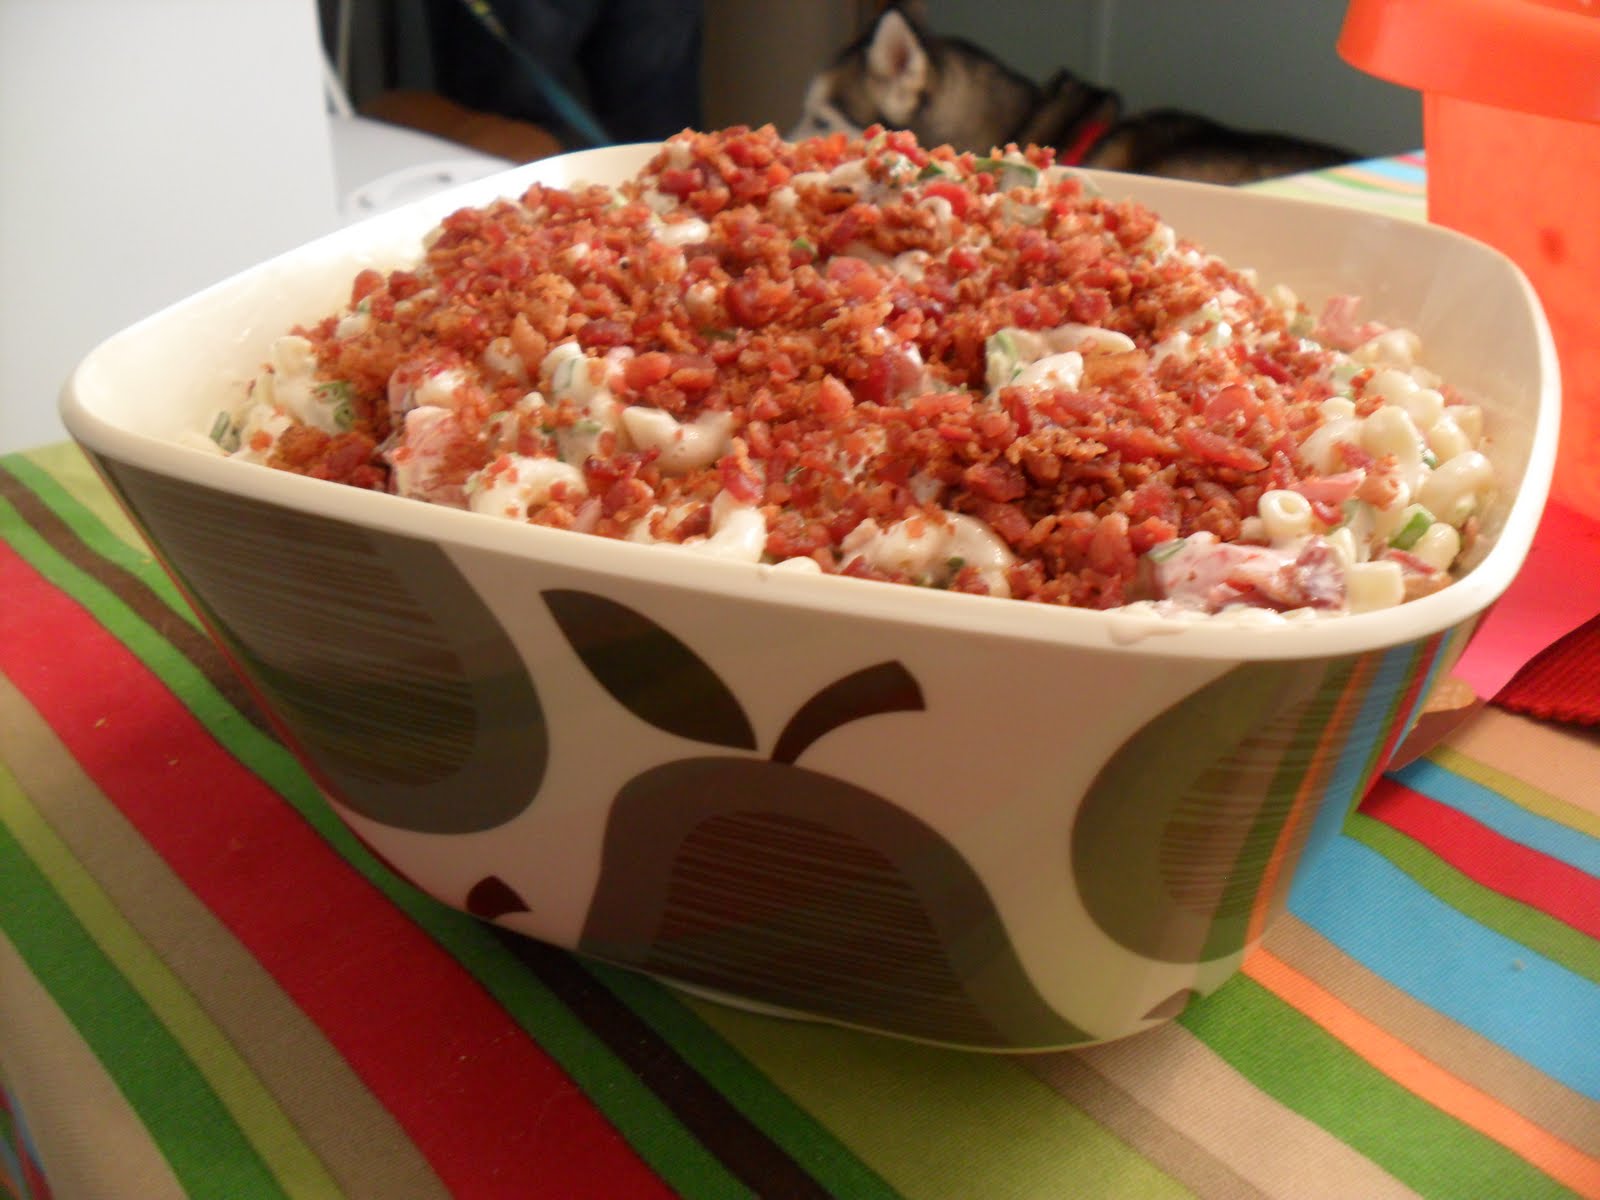
BLT Macaroni Salad
Last summer my old office had several lunch time cookouts. At one of these, my co-worker, Stephanie Ivey, brought this delicious macaroni salad dish that I fell in love with, BLT Macaroni Salad!
It's a great dish to bring to a cook out or picnic. It taste different than just your regular old church potluck macaroni salad, it's summery and delicious!
I know you're gonna love it!
A couple of weeks ago we were invited to a cookout to celebrate the end of the Southeastern semester. It was great! We got to meet lots of new friends and get to know our new church small group a little better. We each brought a side dish, so I, of course, brought BLT Macaroni Salad :)
I usually make a pretty big patch because I'm almost always taking it somewhere, so you may have to reduce this recipe a good bit to get it down to the right size for your family.
This recipe makes 24 hefty servings.
* 4 cups uncooked elbow macaroni
* 10 green onions (about 1 bunch)
* 3 large tomatoes
* 2 & 1/2 cups celery
* 2 & 1/2 cups mayonnaise
* 4-5 tablespoons of rice wine vinegar
* 1/2 teaspoon salt
* 1/2 teaspoon pepper
* 3 3oz. bags of Oscar Mayer already cooked bacon pieces or bits
Cook macaroni according to the package directions; drain and rinse in cold water. Set aside.
Finely chop your tomato, onion, and celery. Place in a large bowl.

In a small bowl, combine the mayonnaise, vinegar, salt and pepper. Wisk until smooth like a salad dressing. (Taste and texture test for yourself how much more or less vinegar you want to add.)

Add macaroni to the large bowl with your diced vegetables. Then pour dressing over macaroni mixture and toss to coat. Cover and refrigerate for at least 2 hours.

Just before serving, add two bags of bacon to the salad and stir it in. Transfer macaroni salad to serving bowl, top with remaining bag of bacon and serve!

Saturday, May 28, 2011
The Quest for Tea Cake Cookies: Making Financiers
What started this quest was the smell of Financiers baking in my oven, so it seems required that I share with you a little bit about these delicious little cakes and the recipe I used for making them.
Financiers are delicious French tea cakes. They are rich, buttery and soft, and the perfect size for a little bit of cake that you can eat anytime, anywhere. Historically, financiers were first made in a pastry shop in France that was near the Stock Exchange (hence the name?) as a quick dessert / snack for the busy business men who were the shop's customers. They are traditionally made in little rectangular shaped molds, resulting in cakes that resemble little "bars of gold," but you can improvise at home by using muffin pans, Madeleine pans, or any other type of small mold for baking. I used my new Madeleine pans for my financiers.
Which leads to an interesting question - what exactly is the difference between Madeleines and Financiers? Many would assume that the difference is merely what they are baked in - Madeleines being always made in the shell-shaped molds, and Financiers traditionally being rectangular and less commonly round. If this were the only difference, then wouldn't my use of the Madeleine pans mean I had in fact made Madeleines, even though the recipe was for Financiers? Both are tea cakes, both have a rich flavor and spongy cake-like texture...
Having made both I think there are some differences beyond the shape of the mold they are made in. At least for my own baking purposes, I have a different recipe for making Madeleines than for making Financiers, with different results. The financiers come out a little denser, more "nutty" in their flavor. In addition to including the financier recipe in this post, I'll later post another entry on Madeleines, and you can compare the two recipes (and their results) for yourself!
The basic recipe for financiers is fairly simple, except for its unusual ingredient - almond flour. Almond flour is what gives financiers the uniquely rich, "nutty" flavor. It's basically just almonds that have been blanched and then finely ground. (In fact, I believe that if you have a good food processor you could do this at home with blanched almonds.) If you have trouble finding it in your regular grocery store, you should be able to locate it at Whole Foods, specialty "gourmet" stores, or places that sell supplies for restaurants.
The great thing about financiers is that not only are they delicious just as they come, but they provide a wonderful blank canvas for adding embellishments and making them your own. For my financiers, I also made candied orange peels which I added to the tops of some of the little cakes for variety. You could alternatively add fruit, berries or jam.
Here is my recipe for Basic Financiers (*note - I read and tried a lot of recipes, and after trial and error, this is what worked for me):
Ingredients -
1 stick of unsalted butter, melted
1/2 cup of all purpose flour
1 cup of almond flour
1 cup of powdered sugar
1/8 teaspoon salt
3 large eggs*
1/2 teaspoon
Additional powdered sugar for sprinkling on top
*many recipes call for egg whites. I used whole eggs and preferred the rich texture that resulted.
Directions-
Heat your oven to about 375 degrees. Using a pastry brush, prepare your molds or pan by brushing with melted butter.
Combine dry ingredients in a bowl first, and mix together thoroughly. Add eggs and melted butter and blend until smooth. Your batter should be creamy and pourable but not to thin. Spoon batter into your molds. I filled each Madeline mold in my pan almost to the rim. Remember, your goal is for the cakes to come out with a raised "mound" on top. Place in the oven and bake approximately 10-12 minutes, or until the tops are slightly browned. They are ready when the cake becomes springy to the touch. Remove from oven and cool on a wire cooling rack. Using a sifter or a wire mesh strainer, sprinkle additional powdered sugar on each cake. *If you are adding berries, candied peels, or something else to your financiers - remove after first 4-5 minutes, add the toppings, then return for remaining 5-7 minutes of baking.
Here's how I made Candied Orange Peels:
1/2 cup of Brown Rice Syrup*
Zest of two oranges - peeled into long "strips" using a peeler or paring knife
* I used organic brown rice syrup that I found at Whole Foods. It's better than using a corn syrup and sugar mixture!
Put rice syrup in a small saucepan and bring to a boil. Add orange peel and continue boiling until foaming. Remove from heat. You can leave the orange peel in the syrup for future use (I stored in a jar). For using on your financiers, remove the strips from the syrup (without draining all of the syrup completely off) and place a few strips on each cake.
And here was my finished product:

Monday, May 2, 2011
The Quest for Tea Cake Cookies: Doing Some Research
When I became obsessed with this idea of figuring out the recipe that my Grandmother would have used to make her Tea Cake Cookies, I do what many of us do - I turned first to google and the internet.
All this time, I had never heard of anyone else talk about "tea cake cookies" so I had assumed this was something my Grandmother had made up, or that even if she hadn't made up the recipe, this is just what she called them. I didn't think, therefore, that searching for tea cake cookies would get me anywhere except to recipes for Madeleines, which isn't what I'm looking for (although I do love Madeleines, and will post later about how they fit into this quest). I started out searching for phrases like "yellow cake like cookies." Those results weren't very helpful, as there appear to be a lot of recipes out there for cookies that use yellow cake mix from the box as an ingredient and these recipes were all I found with this search.
After trying out different variations of similar phrases, I finally decided to just search for tea cake cookie recipes, and for "southern tea cakes," since obviously whatever my Grandmother was making would have been something that was most likely traditionally southern. (note: the thought did cross my mind that maybe this was a recipe she got from the Wisconsin relatives, but usually when she was making something that came from "the north" she made a point of saying so, so I doubted it).
That is what lead me to a whole world of information about Southern Tea Cakes and their history. eHow.com's description of these cookies is as follows:
There were so many websites with information! Who knew there was such a rich and diverse historical background to these little delightful cookies?! I devoured the information like the cookies themselves - if I can't ask Grandmother why she started making these things, I can still find out about their history in general!
The blog for the Itawamba County Mississippi's Historical Society includes a great post on tea cakes, which points out (as I suspected) that even if you grew up eating these cookies in your mom's or grandmother's kitchen, most likely you won't find anything about them in the recipe box, because the recipe was an southern "culinary tradition handed down orally." Tea cakes are among the many different food items currently being reviewed and collected as part of the "Southern Baking Traditions Oral History Project" as part of the Center for Public History at West Georgia College. Hm, either my Grandmother forgot to "hand it down" to my generation, or we just weren't paying attention when she did! Either is clearly possible!
The most interesting website I came across is called The Tea Cake Project. I was completely captivated by the very first lines on the page:
According to the Tea Cake Project's "Background on Tea Cakes" (in which they refer to "Southern food historians" - wouldn't that be a great job?), these soft little cookies originally derived from an English recipe in the 18th century, and the recipe was passed by word-of-mouth for generations. Southerners apparently made the cookies their own with additional ingredients, and mostly had them for special occasions (instead of daily for afternoon tea). The wealth of information on the Tea Cake Project's website is devoted mostly to the African American heritage associated with these cookies, calling it "the national cookie of African Americans." As
they point out, "tea cakes are soul food, and as we know, soul food is rich and wonderful tasting."
Many other bloggers and food writers have had lots to say about southern tea cakes, and what is striking is the theme of evoking strong childhood memories from these delicious little cookies.
On the "Never Enough Thyme" blog, Lana, another blogger from a small town in Georgia, says in the prelude to her recipe for tea cakes the following:
All this time, I had never heard of anyone else talk about "tea cake cookies" so I had assumed this was something my Grandmother had made up, or that even if she hadn't made up the recipe, this is just what she called them. I didn't think, therefore, that searching for tea cake cookies would get me anywhere except to recipes for Madeleines, which isn't what I'm looking for (although I do love Madeleines, and will post later about how they fit into this quest). I started out searching for phrases like "yellow cake like cookies." Those results weren't very helpful, as there appear to be a lot of recipes out there for cookies that use yellow cake mix from the box as an ingredient and these recipes were all I found with this search.
After trying out different variations of similar phrases, I finally decided to just search for tea cake cookie recipes, and for "southern tea cakes," since obviously whatever my Grandmother was making would have been something that was most likely traditionally southern. (note: the thought did cross my mind that maybe this was a recipe she got from the Wisconsin relatives, but usually when she was making something that came from "the north" she made a point of saying so, so I doubted it).
That is what lead me to a whole world of information about Southern Tea Cakes and their history. eHow.com's description of these cookies is as follows:
A Southern tea cake--which looks like a large yellow cookie--is light and fluffy, not too sweet and generally not iced.
There were so many websites with information! Who knew there was such a rich and diverse historical background to these little delightful cookies?! I devoured the information like the cookies themselves - if I can't ask Grandmother why she started making these things, I can still find out about their history in general!
The blog for the Itawamba County Mississippi's Historical Society includes a great post on tea cakes, which points out (as I suspected) that even if you grew up eating these cookies in your mom's or grandmother's kitchen, most likely you won't find anything about them in the recipe box, because the recipe was an southern "culinary tradition handed down orally." Tea cakes are among the many different food items currently being reviewed and collected as part of the "Southern Baking Traditions Oral History Project" as part of the Center for Public History at West Georgia College. Hm, either my Grandmother forgot to "hand it down" to my generation, or we just weren't paying attention when she did! Either is clearly possible!
The most interesting website I came across is called The Tea Cake Project. I was completely captivated by the very first lines on the page:
Remember back to your childhood, when you went over to your grandmother or aunt’s house and she served warm, delicious tea cakes? It was like a lovely, warm bite of hope, optimism, and the promise of a better tomorrow—all in one cute little tea cake.Why yes! I do remember that warm, delicious bite of the cute little tea cake! That's exactly what I am looking for! I read on and on, and signed up for information about how to order the Tea Cake Project's Cookbook (I'm sure I'll be trying out lots of those recipes to determine which is the closest match to what I remember).
According to the Tea Cake Project's "Background on Tea Cakes" (in which they refer to "Southern food historians" - wouldn't that be a great job?), these soft little cookies originally derived from an English recipe in the 18th century, and the recipe was passed by word-of-mouth for generations. Southerners apparently made the cookies their own with additional ingredients, and mostly had them for special occasions (instead of daily for afternoon tea). The wealth of information on the Tea Cake Project's website is devoted mostly to the African American heritage associated with these cookies, calling it "the national cookie of African Americans." As
they point out, "tea cakes are soul food, and as we know, soul food is rich and wonderful tasting."
Many other bloggers and food writers have had lots to say about southern tea cakes, and what is striking is the theme of evoking strong childhood memories from these delicious little cookies.
On the "Never Enough Thyme" blog, Lana, another blogger from a small town in Georgia, says in the prelude to her recipe for tea cakes the following:
It’s not a cake, but it’s not quite a cookie either. It is certainly not overly sweet – just barely enough sugar to call it a dessert, actually. They’re delicious with a cup of coffee or a glass of cold milk. And, if you grew up in southwest Georgia, you can take one bite of a teacake and in your mind you’re five years old again.Hmmm, I think it's time to get back into the kitchen! I'm feeling the need for a warm, delicious little bite of hope and optimism right about now!
Sunday, May 1, 2011
What a WEEK!

This week has been an incredible journey for me, and through it all God has shown me several things. My work week began with dealing with the aftermath of a double homicide in Butts County last weekend. Through several phone conversations with the victims family and meeting with her daughter and son-in-law, God has shown me again why He has placed me where He has. No matter how frustrated the day-to-day gets, I'm there for a reason, and that reason is so I can help people like this.
Early Thursday morning middle Georgia was struck by tornadoes - incredibly powerful tornadoes. Butts County was hit by storms a couple of times over the last few weeks (though nothing like as strong as this storm), and storms raged in North Carolina near the homes of Bert, Stephanie, Alison and Stephen, and I thought, as I do most times "wish I could do more to help" as I prayed for those affected, gave a little money, etc. When those kind of tragedies occur, I occasionally think "if I was able to go..."
Shortly after I arrived at work on Thursday morning, I got a text message from my friend Wanda Moncrief. She had decided that she was going to take some food to Griffin and asked if I wanted to ride with her. Thus began our 3 day journey. Something (or someone!) made me suggest Barnesville rather than Griffin. I know that Griffin had been hit hard, but felt like since Barnesville was smaller and more cut off from media attention, they might not get as much help.
Our original idea was to take a few cases of water, some sandwiches, and a few other items, drop them off and leave. We were feeling pretty good about ourselves! I for one never realized when I sent that text to Wanda saying that I'd go with her just what the Lord had in store for us, but by the time we left that afternoon, I knew that whatever it was, it was much bigger than either of us knew!
Wanda began to work her phone and send me updates by text.....WOW! First she found out where we could go in Barnesville. The first indication I had of this being bigger than we planned was her next text...."I've gotten $69 in donations and Fredalyn Reeves is bringing stuff to the house to take." I thought, "that's good". So, asked her to stop by the office on her way to Sam's, and I took a little money of my own, got a couple of more donations in the office, and got us up to a little more than $100. I was feeling pretty good about myself and Wanda.
Over the course of the next three days, we colledted over $700, many cases of water and food. We had restaurants, individuals and stores in Jackson, McDonough and Monticello donating cole slaw, chicken, tea, ground beef, desserts, diapers, wipes and I don't know what else. God has revealed Himself through it all. With the money we were able to purchase not only everything we needed for their dinner Saturday night, but purchased the items they needed for breakfast today, and at the end, we handed in $270 in cash to further help
He gave us strength and stamina that neither of us knew we possessed. He showed Himself in small, tender moments - a few of which I'll share. It was overall one of the most rewarding experiences of my life. I want to say I look forward to another opportunity, but of course I don't want another storm like this one, or this much hurt and damage.
I was blessed by the little girl who came into the gym where we were serving volunteers after school on Thursday. She looked to be about 6 years old, and came in with her mother. They apparently had only a few minutes really before they had to be somewhere else, but she wanted to stop and help. I got the impression that this was her idea, and that her mother was like so many of us with small children, on a schedule and needing to get to the next stop. Anyway, she wanted to do something....so, she helped an adult volunteer put tablecloths on each table, and then she left. She had done a part, and who knows? Maybe it lit a fire in her.
I was blessed by another little girl, maybe 8 years old, who came in Friday with a bag filled with ziploc bags of cookies that she had made herself. And by the family who came from Covington with a couple of HUNDRED sack lunches - sandwich, apple, chips to pass out through the SA canteen.
And, I was blessed by the National Guardsmen - over 200 of them who had volunteered to come to Lamar County. When I first arrived, I thought "they're all old!" (like my age and older), and then thought that was because the young ones were overseas. By Friday, 175 more had arrived and they were all ages, from all over the place (saw at least 2 I knew from Jackson) there to do whatever they needed to do.
This is getting long, but I want to share one more thing. We worked with an incredible S.A. worker, Wanda Browning. As we were setting up on Thursday, she wanted table covers in the worse possible way. My initial thought was "that's sort of silly, but whatever....". And, when the table covers were donated and brought in - they were THANKSGIVING ones, and I had the same thought. But one of the first soldiers who came in said "HEY! we've even got table cloths!" We had been warned that they would leave their blates, etc strown around, make a real mess, but they didn't. I don't know if it was the presence of those turkeys on the cloths or what, but they cleaned up after themselves! Wanda B. later told me that she wished she had flowers for the table - and you know me. I started wishing for it too. Saturday morning before I went to Barnesville, I did my usual Saturday morning thing, and went to yard sales. God was at work again. The first yard sale I went to had 5 bud vases for sale for 10 cents each. Guess how many tables we had set up in that gym? 5, of course. So, they got flowers on their tables last night, and today.
It was such a rewarding experience, and I saw God's hand over and over. I thank Him for using me and blessing me with all that I saw and experienced.
Thursday, April 28, 2011
Madeleines and the Quest for Grandmother's Tea Cake Cookies

So it was that I have found myself in a state of missing my Grandmother and being nastalgic about the influence she had on my childhood, and this has made me think of her in everything I do. I know this is the case with the rest of my family as well. When my sister recently worked in her new yard, she was naturally thinking of Grandmother as she was working with flowers and things. So many things we've learned from her. In addition to the "life lessons," she taught us the things she grew up doing, skills that many people of my generation may not learn anymore but were once necessary for any girl to acquire, like sewing.
One thing I can't remember Grandmother teaching us (or doing a lot of) is cooking or baking. My Granddaddy cooked many meals for her. I'm sure my Grandmother cooked, and certainly I can remember helping her with big meals for holidays, but it wasn't something she was always doing.
However, at Grandmother's house, there were ALWAYS cookies in the cookie jar. Almost always these were store-bought cookies, usually the little round ones that had some kind of white icing on them (does anyone remember these??) or chocolate chip. They were never a brand like Chips A'hoy or Oreos.
There was one exception - one cookie that Grandmother made herself on a semi-regular basis. They were round, yellow and soft like cake, very sweet, and almost always slightly burnt around the edges. Grandmother called them Tea Cake Cookies.
I hadn't thought about these cookies in years. I certainly didn't think of them in recent years and think to ask my Grandmother about how she made them or look for a recipe. Now that is among the many things I regret not asking her about. I suppose it is always the case that once someone is gone, we think of a million different things we wished we has said or asked. I consider myself very lucky, in that in my last visit with my Grandmother, who had Alzheimer's, she was having a relatively "good" day, and I know that she knew who I was, I got to hear her say she was proud of me, and I told her that I loved her. So it isn't the "big" things I regret not talking to her about. I find, instead, it is the little things. The seemingly meaningless things that become important when you realize how they help you hold onto something. The things like Tea Cake Cookies.
What got me thinking about Tea Cake Cookies was making Madeleines (which of course, are themselves tea cakes) and Financiers. For Christmas, two people gave me Madeleine pans (which had been on my list) - those pans with the shell shaped molds. I was excited to try them out, after having taken a French baking class in which we made both Macarons (not to be confused with Macaroons, but that is another blog post altogether) and Financiers (similar to Madeleines).
The first time I made Financiers in the Madeleine pan, I put them in the oven after all of the prep work and took my dog Mumble out for a short walk while they were baking. When I opened the door to come back inside, I was hit very suddenly and powerfully by the smell of the cookies baking. Have you ever been hit with a smell and instantly had a strong memory that just completely overwhelms you? It was like that for me at that moment. Those baking cookies smelled sweet and buttery, and suddenly I was standing in my Grandmother's kitchen after school and she was taking cookies out of the oven.
That moment started my current quest to discover the recipe for Grandmother's Tea Cake cookies. I will document here the steps on that journey as I research the history of tea cakes, try out recipes, and explore the memories of these delicious cookies with my siblings and cousins, and I hope that you enjoy following along the way.
Wednesday, April 27, 2011
Back to Blogging
OK everyone, we've been pretty absent from the blog for a while now, but we all have lots of things going on to talk about here - so look forward to some posts coming soon!
Topics in the works:
* Our special birthday cake project!
* New recipes
* My search for the right tea cake
* Updates on other projects
Until then...
Topics in the works:
* Our special birthday cake project!
* New recipes
* My search for the right tea cake
* Updates on other projects
Until then...
Subscribe to:
Posts (Atom)